Friday, June 28, 2013

My wall of Dream and Create


I claimed the spare bedroom as my sewing room.
I love this wall. It has place for my ideas, half finished projects and finished projects awaiting ironing.
 
This is my upcycled "Dream" frame.
Now that both kids have outgrown the crib it lies in the garage unassembled after the move. It is too sentimental to give away and probably not as safe at it should be anymore. ( It has been disassembled for 4 moves, turned into a toddler bed twice and into a full size bed once!)
I hang up ideas for future projects and fabrics that I love but not sure what for yet.
 
 
I was planning to just put hooks on the wall for garment hanging but instead I found unfinished wooden spools at JoAnn's. I painted them to look like there is thread on them and just screwed them on the wall and they are perfect to hang hangers on and so fitting - don't you think?


This cute hat is part of Isabella's 4th of July outfit.
Go visit Jenn over at a Jennuine Life  Here for the free pattern and tutorial.


It's totally reversible.


And here  is my first try at a tennis skirt with lycra. Paying $40 plus for a tennis skirt which is such a small piece of fabric that barely covers my buttocks is totally unacceptable. I did a basic skirt and now that I am comfortable working with lycra I can get a little adventurous next time.


Till next time!

Thursday, June 27, 2013

Lego Bedroom


We moved into our Walnut Creek, CA house in January and I usually jump in and do the kids rooms first.Arthur's we did a Lego room and everything had to be Lego. I have pinned this beautiful Lego quilt a year+ ago and really wanted to attempt it but projects always got in the way and I ended up just buying a blue duvet cover.
Lately neither of the kids wants to sleep alone and Isabella always ends up with us in bed and then Arthur comes sometimes and drags Hubby to his room.
I have had enough and want my room back so we ordered a trundle and mattress for under Arthur's bed. I made the lego quilt for Isabella for on the trundle but Arthur insists on having it so I will have to make another.


Here is his cupboard. It was really old so I didn't mind painting them. Next thing would be to replace them. The one side has magnetic and blackboard paint.  The other side has two black board paint lego figures that he also likes to color with chalk.


This is at the entrance of his room and they both can keep themselves busy for quite some time making shapes with legos.(It is 4 base plates hammered to the wall)

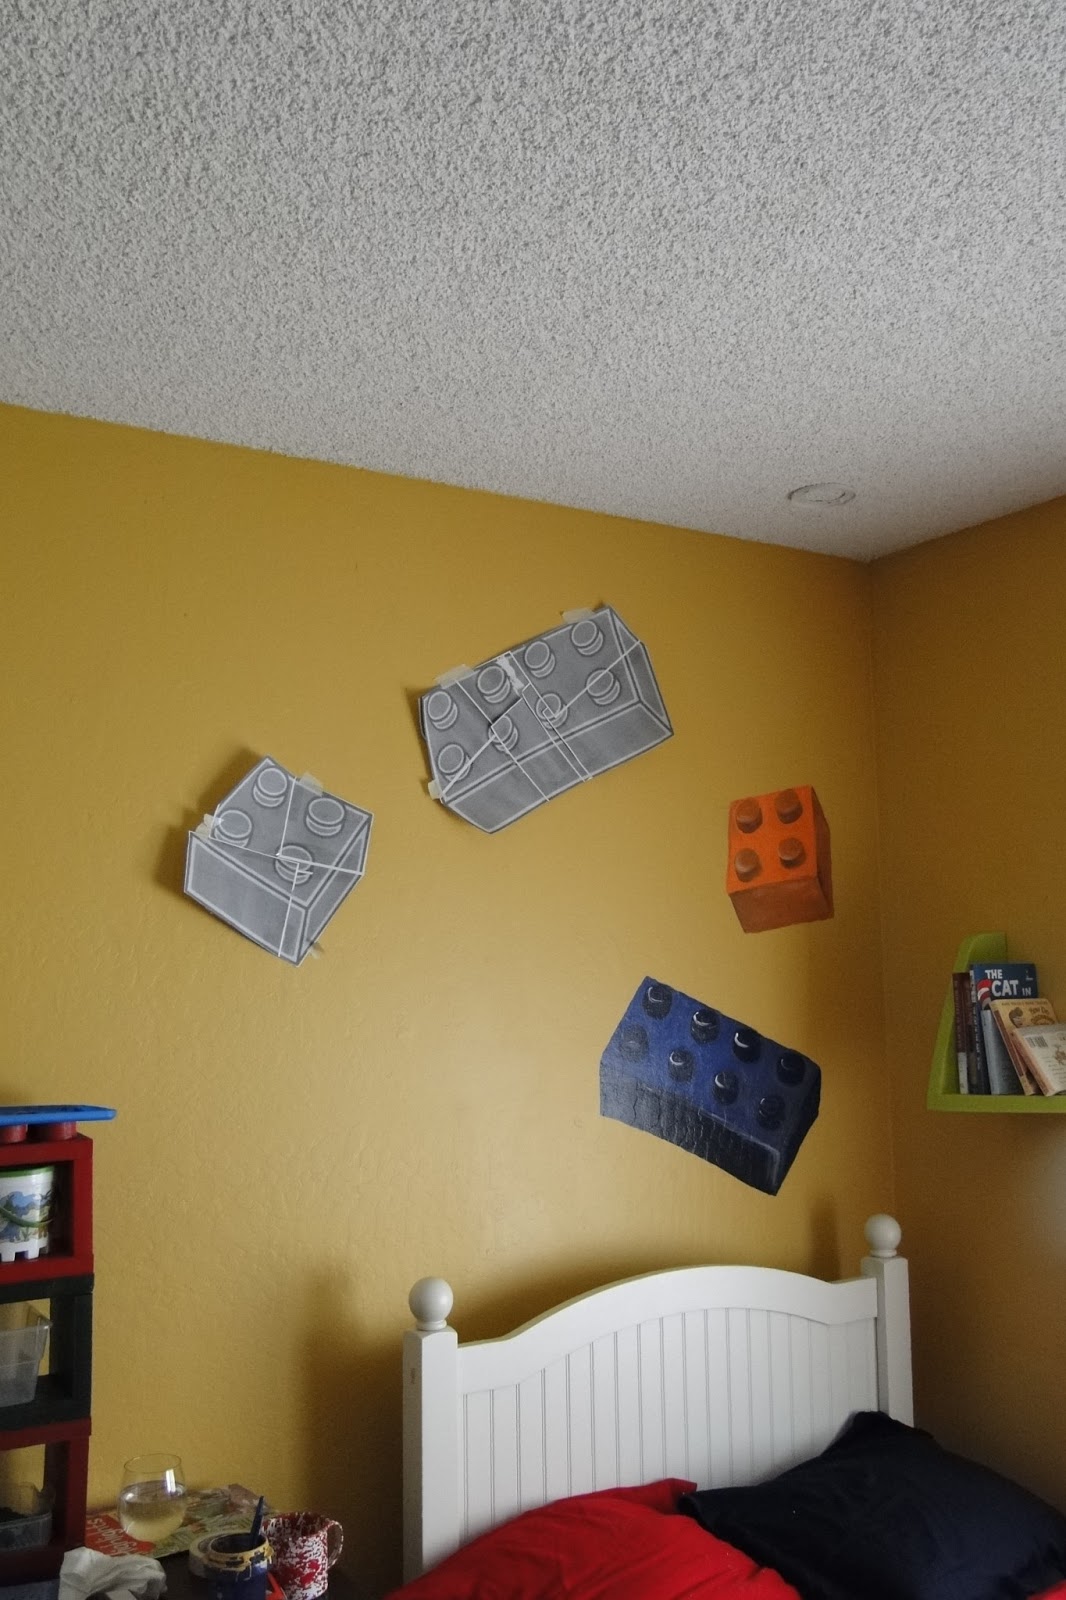
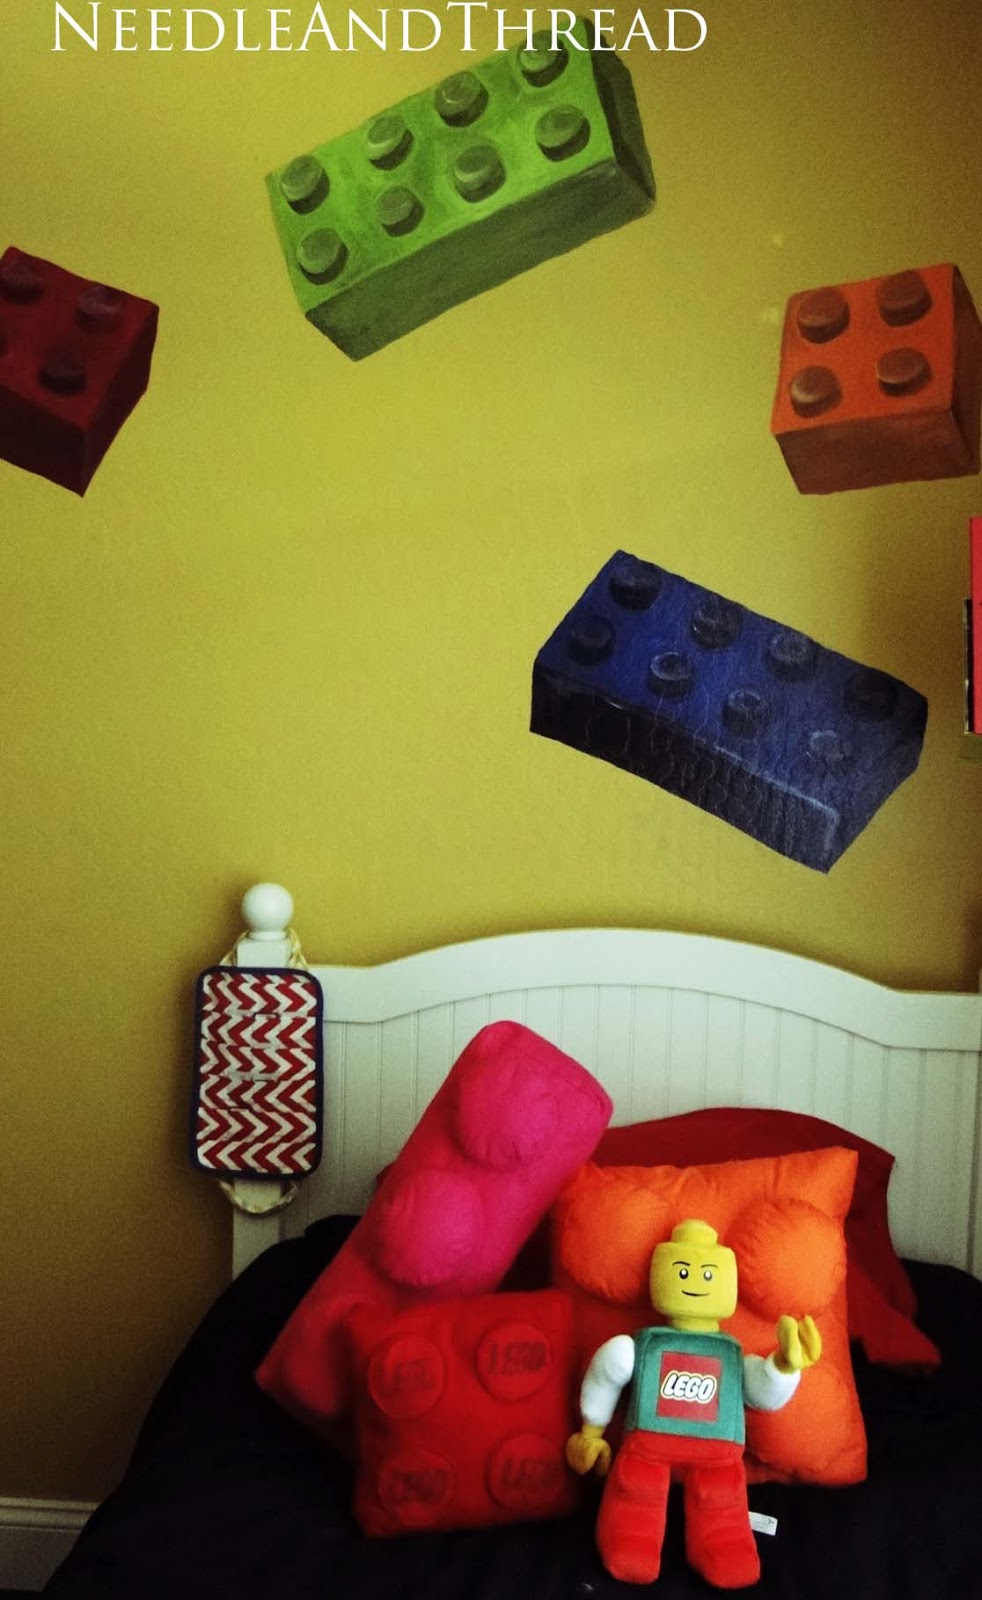
Blocks were painted on the wall. If you want to know more about it you can look it up here .


These shelves are perfect to display his lego masterpieces and high enough so his sister can't reach them.


 This is our favorite Lego book " The Christmas Story" Even though it is not Christmas we still like to read it and enjoy it right through the year.It was a gift from a very special friend over Christmas last year.
There it is. I had so much fun making it and it is real easy once you know what colors you want and where you want it.


The Quilt Process:
The whole idea came from Hillary Lang over at wee wonderfuls when she blogged about
     Oscar's lego quilt . I pinned it a year ago and finally made my way back to make one. If you are looking for the Lego stamp picture you can also find it there.
My chosen fabric was  pink chalk color box mini that I purchased from Pink Chalk Fabrics ( Love this store.) It was just enough to make a quilt for the trundle. I just had to add solid for the back and bias binding.
Hillary did a very cool method of making the quilt layout with lego blocks on a base. I knew I was probably not going to have enough blocks and not the right sizes so I ended up matching crayons to the fabric and drawing out my quilt on paper ( I printed out a diagram of blocks from the computer) and coloring it the colors I picked out. See below. Each lego dot is 4 inches so each block on my graph was representing 4 by 4 inches.
I also cut out lego sizes and marked them with what colors I needed to cut.
making the stamp is very easy as long as you remember when you are done it needs to read from right to left. I made my stamp and when I started to stamp I realized it was wrong and had to make a new stamp.


This is how it SHOULD look like


Hillary used stamp ink. I opted for mixing acrylic paint and textile medium. If you do it this way do  not use a paint brush  - Use a foam roller. The reason why I painted is because I wanted each color block to have the same color dot but darker.
Here you can see the foam roller and the dark green paint for the green lego blocks.

They dry very fast and I was very happy with how they turned out.


The sewing part is the fastest.The planning definitely takes up most of the time as well as the painting but is FUN.
I hope you enjoyed all the LEGO fun.

More Lego Pillows with Free template HERE


Lego Pillows

 
so Arthur's room has turned into a Lego Explosion. Both the kids really enjoy Lego's and since Isabella spends most of her time in his room it turned into a bedroom/ playroom. I made him the orange lego block pillow first. He really enjoys it so I ended up making a pink one for Isabella and a red one to go on the chair.
 
I have used different methods with all three. I liked the red one the best. I will add a few pictures of the making process. I made a  lego quilt where you make and use a stamp to create Lego blocks. I will do a post on the quilt next time because it was quite the undertaking. More on the stamp there.
 
I searched for a Lego plush guy and to my surprise I actually found one HERE


I painted the lego blocks on the wall just after we moved in. ( I googled lego block images and enlarged the image and used transfer paper to trace the image on the wall and then painted them.


He looks happy doesn't he?


I made the stamp with Speedball stamping block .
 
 the other method of the lego dots was more tedious so I opted to just circles ( 4 fabric and 12 felt circles) I laid them out first on a piece of felt so I know how big my pillow should be. Each circle has one fabric and 3 felt circles to give it some depth. I just pinned it on the felt and sewed around each circle.
 
cut another square for the bottom of the pillow and a strip of felt ( length is the sum of the four sides.)
for the sides.
 

this is how I sew my corners when making a cube.


 I Go all the way to the fold, needle in lift foot turn your fabric,
 
  flip the fold to the back of the needle
and continue sewing.
 
 
when you turn it inside out there will be no bundling.

 
leave an opening in the side to turn it inside out as well as stuffing.
 
 
My next post I will show you the quilt.
Till next time......

More Lego Pillows with free template Here


Saturday, June 22, 2013

$3 Thrift finds

 
I did these desks a few months ago but did not share them on my blog yet. I bought 2 desks from Goodwill. The  local college  was getting rid of a whole bunch of old desks. They are nice solid desks and I wished I had bought a third for when Isabella is bigger.
The one I turned into a Lego desk for Arthur and made some lego shelves to go with it to have all of his pieces handy when he is building. When he is done he can just put it all away and use his desk for drawing etc.
 
He is only 6 so the desk is still high and he has to sit on his knees. His old Eddie Bauer high chair was standing and collecting dust since both him and his sister has outgrown it. It is a nice solid chair and every time we drop things off at Goodwill I just can not get myself to throw it out. Glad I didn't. We sawed 2 inches off the bottom, removed the tray and tray holder and spray painted it blue. Now I have to say both my kids LOVE it. They lug it around and fight over it. They even like to sit on it while watching TV or playing wii. I think I should keep an eye out for another  at a thrift store.


I added this side panel for all the lego bases and instruction booklets.
Its made with a few pieces of wood and the lego dots are made with a thick dowel rod that has been sawed down in even pieces.
 
this is how the shelves was made the top ones also had dowel rod pieces.
 
 
the containers is from the dollar store and I made the cubbies so the containers fits in nicely.


 This one I painted with outdoor paint and made honeycomb cubbies for my pots and tools.
I use it as my  garden center.The drawers are mod podged. It stands out on the porch and holds up nicely in outdoor elements because of the outdoor paint. The porch does have a roof so it doesn't get direct rain.
 
 
I thought it was time to at least blog about this especially after seeing that Jenn over at
a Jennuine Life is doing Thrifty to Nifty Thursdays. Grab a button on the right side if you like to upcycle and head over to her blog to add your projects and/or get some inspiration.
She also shared this Free camper hat pattern and tutorial that I am excited to try.
 
That's it for today. See you next time.