Friday, May 31, 2013

A fun orange and blue outfit for a very active little girl........

 
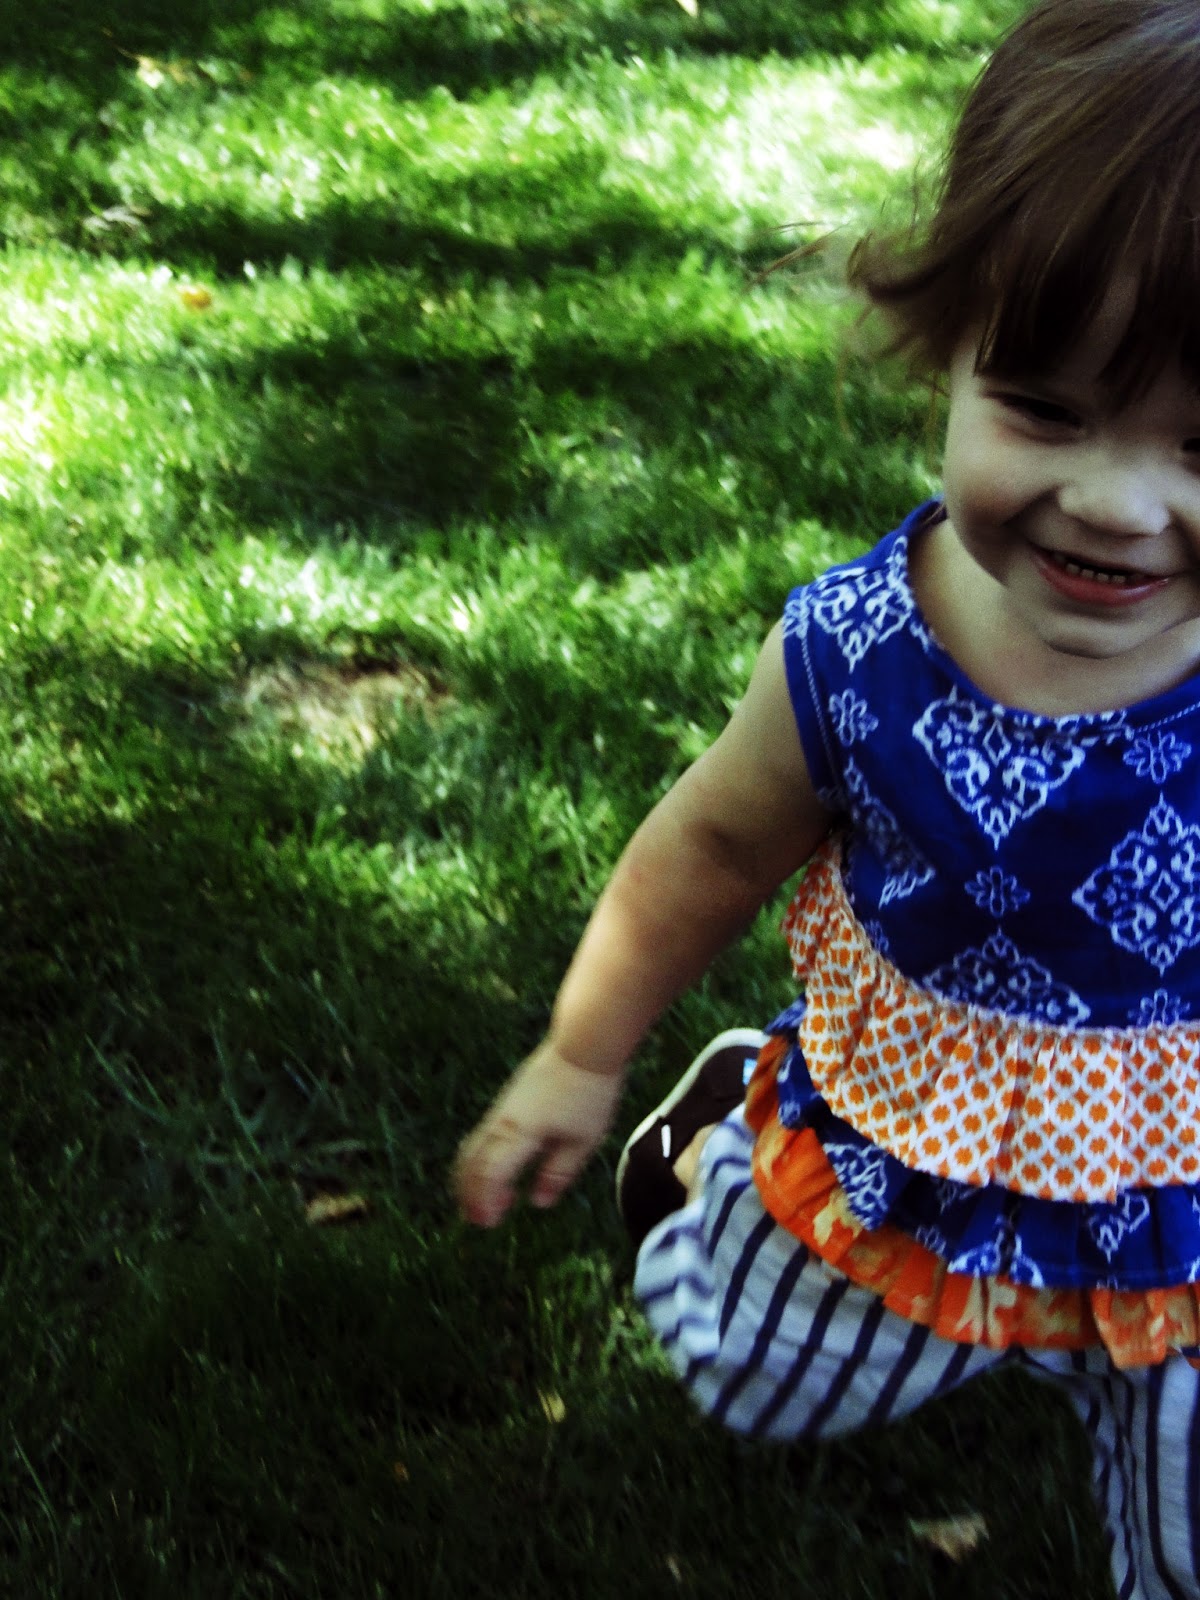
These are my favorite colors together lately orange and blue ( the darker the blue the better.) This is the perfect outfit for Isabella because she likes to dress up like a girl but she also loves to climb and do adventurous things. These pants are light and moveable and allows her to do just that.


I used a favorite shirt of Isabella to cut the pattern.
 
 
the front is going to scoop down lower like on the left.
 
 mark the places where you are going to make your frills. I made 3 inch wide lines.


 the strips I cut was 3 and a 1/4 of an inch.(this accounts for the bit where they overlap as well as seams on the bottoms of the strips.


this is the top of the strips where you will gather the fabric by pulling on either both the bottom threads or both the top threads.

I chose to do just a slip in the back to add a button. Mark your slit and cut a piece of fabric with interfacing (also mark your slit here on the wrong side) and line them up correct sides of fabric facing eachother.

sew on the mark and cut open like below.
 
 
turn inside out and topstitch


I first sewed the shoulder seams first added the bias binding around the armholes as well as the neck and then I did the side seams , serged it and put in a bottom seam.

 
There it is all finished......


 The pants I adjusted my favorite pants pattern for Isabella. It is made by Made. Even though I changed it is my go -to basic pattern and fits great. Hop on over to here to check out this cool pants pattern and tutorial. She has some great patterns here - so click it and go check it out.


I made the pattern shorter and added a round side so it is more like a bubble.
 
I used my circle ruler to cut the little front inserts that I added on the top of my front pants pieces.


The rick rack was sewed on one of the pieces before I sewed them together to keep it in place.
 
 
add the other part, sew together and make your little slits to make sure when you turn it inside out the circle is nice and round.


I first just sewed the outer sides together so that I can add my tag and do 2 rows of topstitching in orange.


this is the bottom cuff of the pants. Cut it and make sure your childs leg can get through it. I ironed the bottom already so it will be easy to fold under and just hand stitch.


I added elastic just to the back


I think it has kind of a Nautical feel so I call it her sailor outfit.


Wednesday, May 29, 2013

Let's call it "Independence"

I knew I had to have Isabella's 4th of July outfit somewhere in my schedule in the next couple of weeks. When I heard it was skirtweek I knew today was the day that I was gonna tackle that project. To celebrate Independence day and also the fact that this is a big year for Miss Bella's independence ( or so she thinks) I wanted to do something that she can be active in just like she likes to be but also still something feminine just like her.


I used New look 0176 as my base pattern. I wanted to do 2 layers with the top layer being 3 pieces of  fabric blossoming down. I decided I am first going to sew the layers together and then cut the pattern after I assembled my 3 pieces.
 
 
Here are the ingredients:
These are all different fabrics from my stash. I love the top fabric for 4th of July because it makes me think of the fireworks.


I first cut out the bottom layer of the skirt by using the pattern piece to cut 2 panels on the fold.
The length of the skirt was 12 inches so I  cut 3 strips that was 4 and a 1/4 of an inch wide. I also cut the band with the top fabric that I was going to use.


I first just sewed two skirt panels together just on the one side. serged and folded my bottom seam over and marked where I was going to add my net ruffle.(one inch from the bottom)


for the strips of fabric I serged at both top and bottom and then made two rows of wide stitching like when one does a ruffle.I pulled the bottom threads to create a bit of a ruffle on the middle and bottom strips.

Picture below is of the fabric on the wrong side. I attached the two fabrics by overlapping them. I used my ruffle bottom stitch as a guide of where to pin the fabric. I did this with all of the strips so that the fabric looks like 3 ruffles sewn together.


Next was the net part of the skirt that I wanted to add to the bottom layer. I love that you can buy the net on a roll and then you do now have to cut it yourself. I folded the strip of net in half and make my stitch on the fold. If you use an universal needle and a 4 setting(stitch length) you can just sew and it will pile your net neatly like shown below. I used dark thread to make it easier to line it up with my white chalk mark I had marked on my red bottom layer earlier.

 
Here is the red net all gathered and lined up on my white mark on the bottom layer of the skirt.


Next I am going to cut my top layer of the skirt. I also gathered top layer so that it makes a natural curve along the top line of the pattern.


sew the sides together and make sure your pieces line up like below.
SIDE SEAMS of top layer.

after the top layer is sewn together. I sewed the other side of my bottom layer  with the net attached all the way around. After that sew the bottom seam of the bottom layer.

 
Here are the two layers.

 
You are going to pull the top layer over the bottom and make sure the top of both layers line up and pin them together.


This is the band for the elastic. sew the ends together and leave a part open where you can thread the elastic.
 
fold the band double and  pin to the right side of the 2 layers.

 
sew it together and serge.
 

I folded the serged part on the inside up and gave it a topstitch through the top side of the band.
Here is the skirt almost done. All it needs now is the elastic. Measure the elastic around your childs waist so that is semi tight.
Thread through the band.
pin it together and sew through it a few times.
After I put in the elastic I also made a topstitch over the top of the band through the elastic so that it keeps flat and doesn't bundle .


And there you have it. A happy girl with a very fun "Independence" skirt.
I am still thinking about what shirt to make but that's next week.