Sunday, February 2, 2014

week 4: Signature Style

  Phew - time sure does fly when you are having fun. Last week of Project Run and Play..... and even though this is my second time sewing along - this season is my first time I was able to sew all 4 weeks. 

This week is signature week and I tried to incorporate all that is important and fun for me in an outfit.

Things I consider to be my signature style.....

  • I always try to sew comfort even for myself I love comfort yet stylish! 
  • FLIP - I rarely sew a pattern just as is. I love to keep the basics of a pattern so I don't lose the designers hard work but like to add my own spin.
  • Mixing textures ( different types of fabrics) and matching different colors.
  • Using art forms of the sewing craft- embroidery,knitting, applique etc.
  • pin tucks, ruffles and shirring are favorites in Isabella's outfits
  • And finally ACCESSORISE - hats,headbands,hairpins and in this case Legwarmers.
So for this season this is what I came up with......

I have a  short shirt-dress, a long-sleeve shirt, go-to leggings, legwarmers and a felt flower headband.


The felt flower I made with a poinsettia  tutorial I saw over Christmas ( sorry I cant give credit to whom it is due I just cant find that tutorial) but Isabella fell in love with the bigness of it so I made a mustard colored one in felt and made a headband to add it to. Surprisingly it stayed on her head through both Picture sessions and some ......


both shirts I used one of my favorite simplicity paper patterns NR C2019. It is a tiered ruffle dress but what I really like about the top part is the gathered neck line and recess sleeves. 
For the long sleeve shirt I extended the body, added shirring around the neck and middle, lengthened and narrowed the sleeves. The fabric is Feathers on White cotton jersey knit blend by Girl Charlee. I bought it a while ago and it went perfect with my color scheme for this outfit.


 One of my challenges with this outfit were getting the right needles for the legwarmers. I saw a little girl with leg warmers the other day and started googling legwarmer patterns for toddlers. It seemed that what I was going to need is a circular needle. my knitting abilities are limited to the basics , I've never used circular needles before and  two trips and 3 pairs of needles later I ended up with these little circular needles . As I was looking at  it I had no idea how I was  going to manage such tiny needles - but I succeeded .
 Cast on was 36 stitches followed by 8 rows of 2k2p and then 4 rows of knit with the teal followed by 4 rows  knit of purple (52 rows all together repeating colors beginning and ending with the teal) and finally the ribbing again which was 8 rows of 2k2p. 


The dress/shirt I used the same pattern for the top. I added pin tucks to the front and a functioning button placket. The sleeves I widened and lengthened. I used traditional sweswe for the top piece from my stash that my mom always bring from South Africa when visiting....


The purple buttons I found went perfectly with the purple of the sweswe


the skirt part was a self drafted skirt. I made bubble ruffles with a mint green knit fabric and added a high-lo skirt made with  Koi VOILE by Rashida Coleman-Hale for Cloud 9 .


the weather  was kinda yucky today so we had to hurry for a few shots before the rain came but we really need it here in California so we are thankful for Rainy day Pictures!


I cut the headband wide on top so it keeps a lot of hair away from the eyes but narrower  around the ears and back for comfort. It works very well and I will be making more like this.


The headband has elastic in the back to make it fit easily around the head.


as I said COMFORT is key...


And so the season has come to an end and I had so much fun sewing along, and admiring all the contestants and sew-along entries. I've learned a few things and stretched my imagination and boundaries. Here are my entries. I loved them all but my favorite this season was the Movie week. I had fun, the kids had fun and that made for a very special week for me......


and as always I have to end the post with one of many funny faces and seeing that Valentine's day is around the corner let's do it with love....


Till next time......


Saturday, January 25, 2014

Bella's Witches and Wizards Birthday Party

so Bella's 3-year old Birthday party was 3 months ago and I thought maybe I should upload the pictures of the cake and how it was made. Unlike a 3 year old girl Isabella is in love with monsters, witches, vampires etc. Maybe because she was born end of October? 
She really wanted a witch party and because I always bake and decorate their birthday cakes I started panicking and wondered how in the world will I make a witch cake. Pinterest is full of some really cool cakes. The fact that I am not a professional baker and my cake skills are limited to twice a year with the kids birthday cakes made some of them impossible. I am always amazed at the talents of bakers out there - so cool.There was a lot of pictures floating around with the witch legs sticking out and I thought that that might be do-able. It really is...... and I came up with this....


Now I have to say even though there is a lot of pictures out there,  there is not a lot of instructions!

First I made the hat , broom ,legs and flames the weekend before.


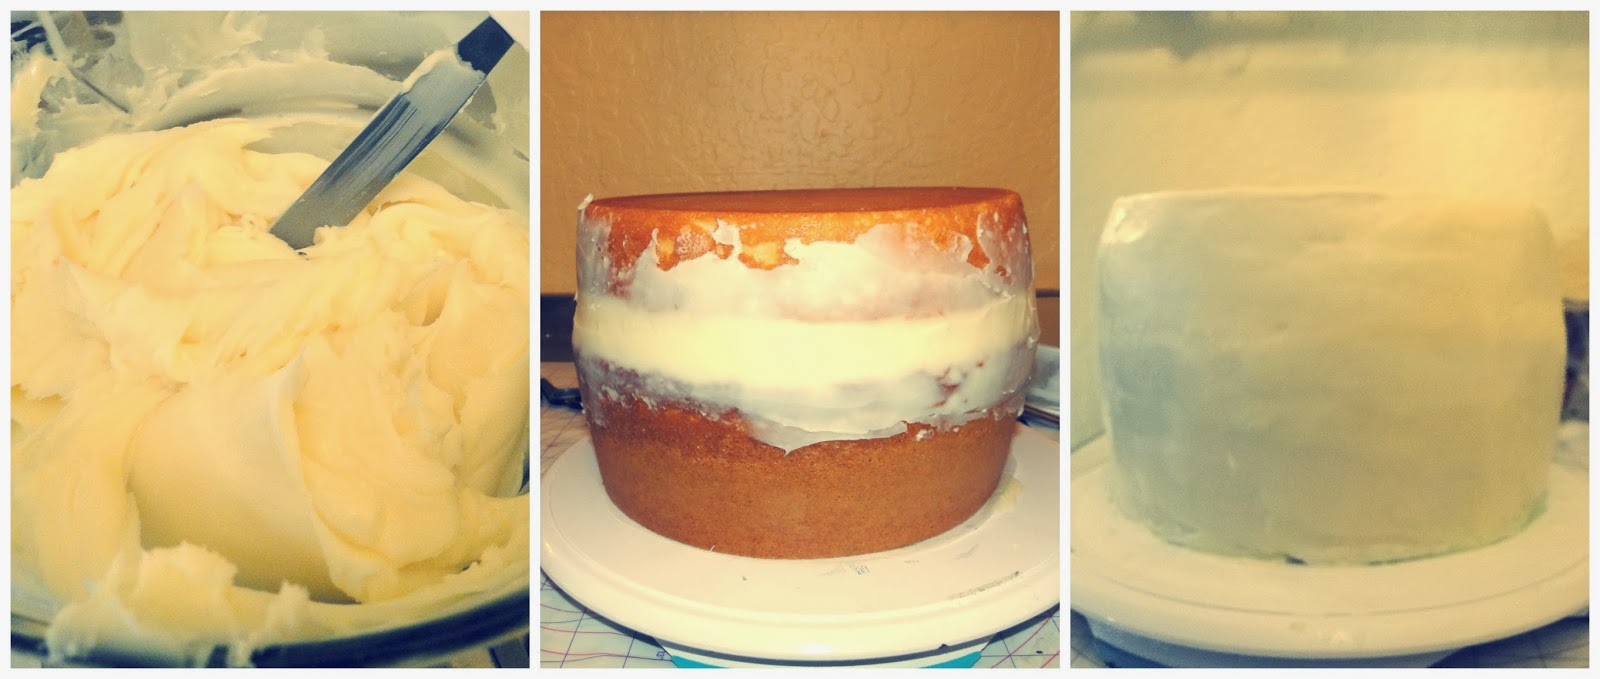
 The party was the Sunday and I baked the cake on the Friday using This WASC cake recipe . I have never used it before but was very pleased with the result and if you are looking for a cake recipe that is gonna hold up for big cakes this is one you might want to give a try. I used a big round pound cake pan for the bottom and a normal round pan for the top of the cake. I filled the hole of the pound cake with chocolate ganache and then covered the cake with white chocolate ganache. I have always worked with butter cream frosting before but from what I heard of ganache it seemed that I might want to give it a try with this cake. I watched and used 3 part video tutorial on ganache and how to get a smooth edge to cover the cake. VERY HELPFUL and I do agree that it makes for smoother cakes. For a first try it didn't turn out bad at all. I covered it with black fondant added a brim and handles. Filled the top with chocolate frosting and green round candies for a green potion effect.

This was one heavy cake but enough to feed everybody and some.
the kids loved these legs sticking out......


The Party:

we had the party at My Gym in Walnut creek, CA and was definitely the best choice ever. The staff was great and the kids had fun with all the activities. They really went out of their way on making Bella feel special and she really loved that.
eventhough Miss Bella wanted a witch party we made it a Witches and Wizards party to include the boys as well. For the favor bags we made Little wizard and Little witch bags filled with Halloween goodies from oriental Trading . The wizard and witches hat was made with this tutorial from Delia Creates  for the wizard hats I made a shorter brim and added a felt star - for the witch hats we added some purple ribbon. The kids had much fun with these.

 There was a Mary's Pizza shack next door so we had pizza and fruit salad to fill those bellies. The fruit had was made with the same polystyrene cone I used for the fondant hat - covered it in kale and then all types of berries. for the water bottles I downloaded a witch on a broom picture and printed it on glue backed purple and green paper sheets. The Witch potion was lemonade with sprite. what you cant see in this picture was  these little reusable round ice cubes that looked like eyeballs drifting in the "potion" I wish I had made pupils on them to look more real.

 The Party crew!


And so another Birthday party is finished and we all had fun. The girl was happy and she felt special and at the end of day all that matters which makes it a huge success!


till next time........

Wednesday, January 22, 2014

Week 3: repurposing

I think this is the first time ever that I am actually ahead of schedule when it comes to sewing. This is for Week 3 in Project Run and Play and it is time to Recycle/Repurpose! This was super fun. I have a pile of clothes from the kids that are either special  and too small and I don't want to give it away or it is in my pile to go to the garbage if I cant figure out what to do with it so I had enough material to use.  When I thought about what I was going to make it had to be something very comfortable yet Girly. Bella is a girl that likes to play like a boy but still dress up like a girl so I decided on a T-shirt dress with a circular skirt that she can still twirl in. Also made some pants for covering up when she is hanging upside down. 


The green shirt was cut down on the sides and sewed down to be more fitted and the sleeves were cut off and recessed. The skirt turned out perfectly twirly. For the pants I just by chance had an adidas t-shirt that was brand-new but ended up with glue on it and on its way to the garbage. The greens between the top and the pants matches perfectly and I ended up making pockets with the orange shirt's sleeves. ( Pants were made with the Go To Leggings Pattern by Go To Patterns. ) 

Our neighborhood were lucky enough to get the playground gutted and a brand-new playground took its place. We got to play on the new play equipment for the first time while taking pictures and testing out the flexibility of the new outfit. Mission Accomplished!


 The hair-bow was made with part of a t-shirt and neck ribbing.


This is definitely a Bella dress - It fits her vibrant and colorful  personality all the way!


and what's a Blog post without a silly face?


Till next time.................

Monday, January 20, 2014

Week 2 : Let's go to the MOVIES!


Hi everyone,  It is week 2 of  Project Run and Play. and it is Let's go to the Movies week!!!

as you can see I chose Bonnie and Clyde. I have always been very interested in this couple who robbed banks. The fact that I have two beautiful children one of each made this the perfect choice. I sew mostly for Bella but Arthur gets so excited if I sew for him so I really have to include him more.
What a fun week. I had so much fun planning this outfit and the kids couldn't wait till I was finished so they could put it on.


The color scheme I chose was brown in orange.My movie inspiration was the 1967 Bonnie and Clyde with Warren Beatty and Faye Dunaway........


Clyde's Outfit: Pants: Number 9 trousers from Gotopatterns I added pockets with flaps on the sides and a strap with buckle on the side and an additional zipper pocket on the other side. the back has pockets as well. My kids loves pockets so he is very happy about that.
T-Shirt: the tshirt is the recess raglan pattern from Gotopatterns and I use this pattern constantly. 
Vest: is the bbc vest from Shwin designs. I didnt make any changes to this - I absolutely love the look of this vest and thought that was dapper enough for Clyde.
Hat: is the Fedora Hat pattern. I wish I had a better suiting fabric for but the linen I had worked fine.

I made a tie from a fat quarter I had in my stash with browns and oranges.

Bonnie's Outfit: skirt was selfdrafted with pockets and a funky inlay in the front.
Shirt: is also the recess raglan but I made the sleeves wider and added some elastic around the wrists.
The hat was just a self-drafted hat made with felt rectangles to resemble Faye's hat in the movie. I also made a orange brocade scarf for around her neck that she likes to hold around a month just like a bank robber.


As we entered the open space a couple was on their way back and immediately asked if they were Bonnie and Clyde. Well mission accomplished I think.


They really lived themselves into the roles and we were exhausted and so full of dust by the end.
Fun was had by us all!


I love how the pants turned out.


I hope you had fun looking at the pictures - we sure had fun taking them.